KVM GPU Passthrough Home Theater VM
Published: August 01, 2024Introduction
My dad purchased a Samsung S89C OLED TV, but my Homatics Box R 4K Plus (HBR4K+) was still somewhere in China.
For basic playback on a 1080p TV, I could simply connect my Linux server or a spare laptop to the TV via HDMI. But with HDMI 1.4, these devices were insufficient for 4K HDR playback.
The only computer in my house capable of HDR playback was my RTX 4070 Super desktop. However, I was using that computer daily and moving it from the office to the living room was not an option.
Without getting too deep into AV codecs, TV boxes and passthrough, the only temporary option is the Nvidia Shield TV Pro, costing C$296 in 2024. Too expensive for a transitional device before HBR4K+ arrives. Adding insult to injury, the Shield does not support HDR10+, an unfortunate limitation considering I have a Samsung TV.
Furthermore, my original plan was to use my old AV receiver (AVR). Since TV boxes only have 1 HDMI output and my old AVR is 1080p, I needed an eARC extractor to split the 4K HDR and the lossless audio separately to each device.
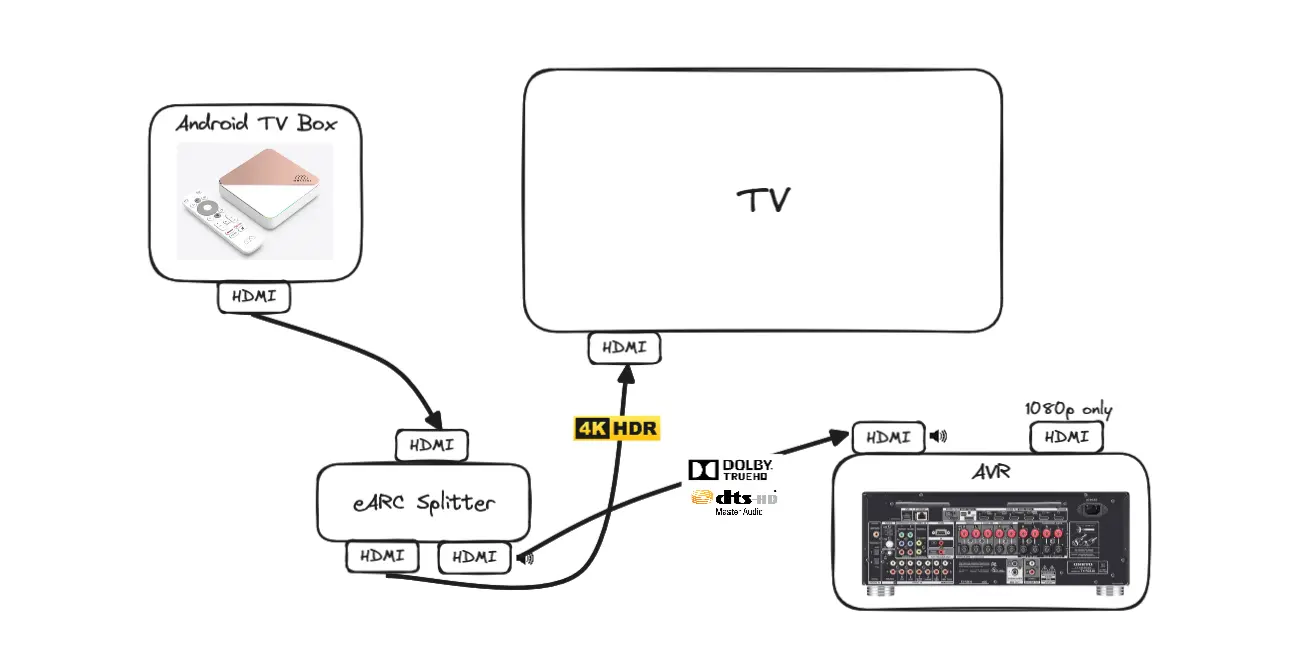
On top of C$296, I also need to buy the eARC extractor. In Canada!
The Old Rig
My old computer had:
- AMD Ryzen 1700 8-core CPU
- MSI B350 Tomahawk
- Nvidia RTX 2070 8GB
Sadly, the motherboard somewhat broke and no longer supported dual-channel memory. I literally sold it at a below-market price earlier. That rig would've been great for this; playing videos doesn't exactly need high memory bandwidth.
Even still, I need to buy an SSD, RAM and a power supply on Facebook for a fully functional system.
But I already have a functioning computer, the mutant CPU media server, and the RTX 2070 which is suitable for 4K HDR playback.
KVM
My server already has CPU, RAM, storage, power supply and an empty PCIe slot.
Except in 2024, HDR wasn’t a straightforward option on my Debian setup. Based on r/htpc discussions, Windows was the only straightforward option.
I needed to run Linux for production services and Windows for media playback on the same machine, with Windows requiring exclusive access to the GPU.
The solution is Kernel-based Virtual Machine (KVM) with PCIe passthrough.
Hardware
GPU installation is straightforward; I’ve done it countless times, even filmed it. Though my old PC case wasn't designed for a GPU plus multiple hard drives, I had to move one of the hard drives; it was a tight fit.
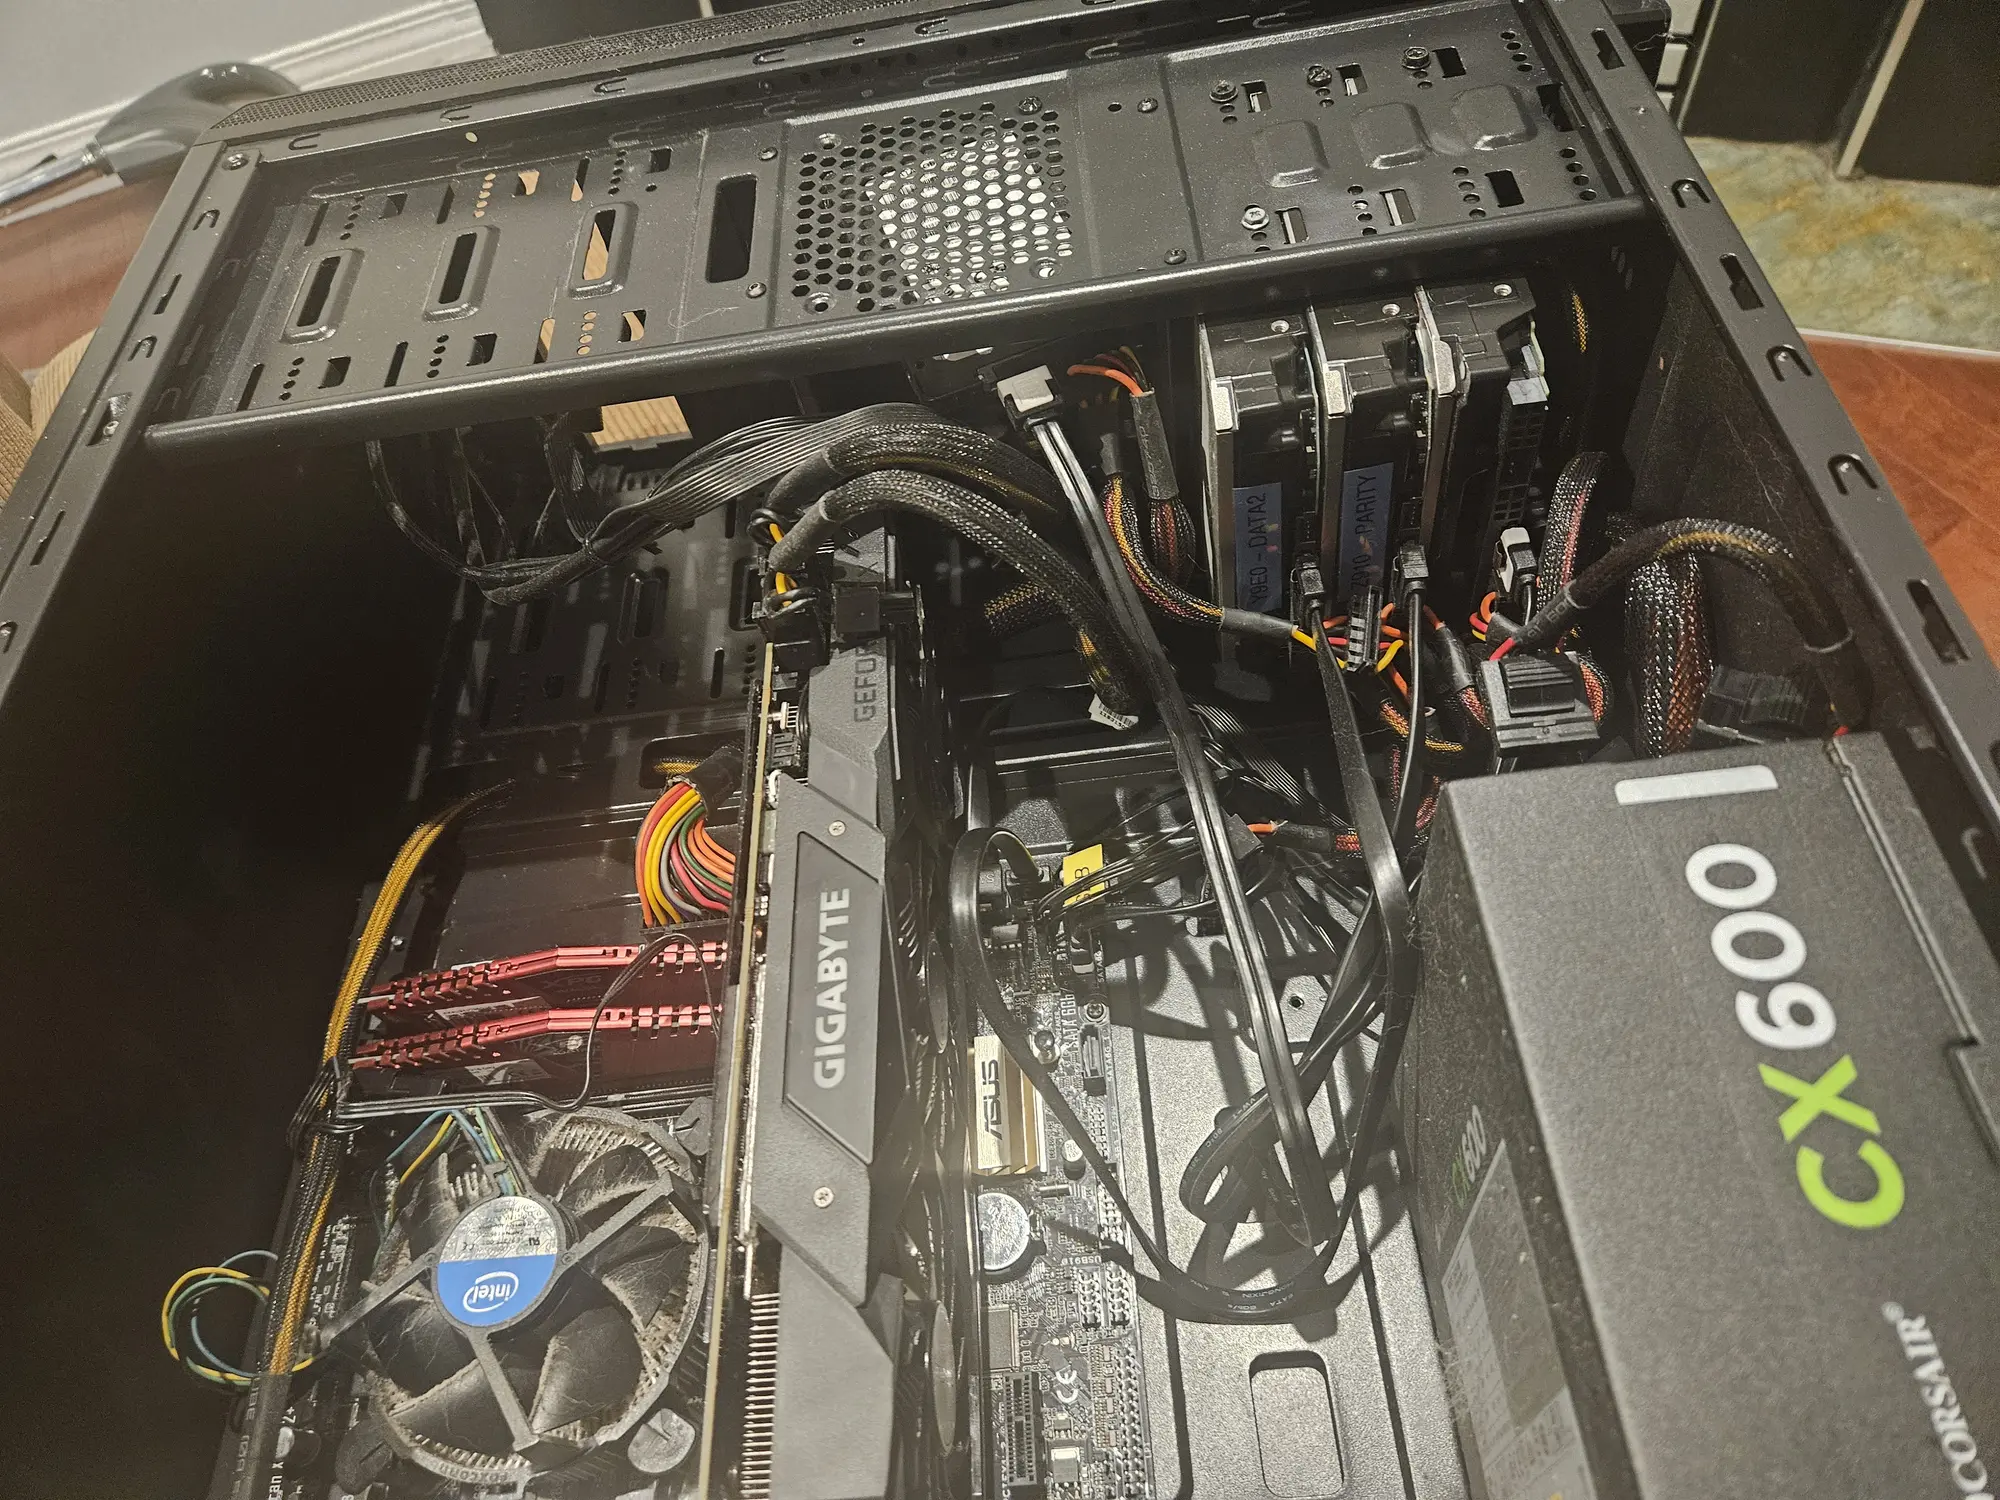
The existing Corsair CX600 PSU has plenty of connectors and power to accommodate the GPU.
Preparation
When I tinkered with Proxmox before, I remembered that memory ballooning won't work with PCIe passthrough. This allows a VM to dynamically adjust its memory as it’s needed. But now my VM will use the entirety of RAM assigned to it.
The server only had 16GB of RAM; even a debloated Windows install needed at least 8GB. That leaves only 8GB for Debian and my services.
Minecraft had to go; my modded server is memory intensive and 8GB won't be enough to share. I decided to move it to my laptop server. That is just a simple backup, copy, and restore.
VM Storage
The server currently has 2 SSDs,
- 256GB SATA for the OS
- 512GB NVMe previously used for Windows 10, now mounted at
/mnt/nvmeas a generic NTFS storage
Just like a GPU, PCIe storage devices can also be passed through, and I might be able to reuse the Windows installation. Well, foreshadowing is a literary device where a writer gives an early hint, sign, or warning about an event that will happen later in a story.
The alternative is a qcow2 disk on Linux, either taking tons of space from my SATA boot drive or on the slow NTFS mounted NVMe. The decision seemed obvious.
To prep the drive for passthrough, I backed up the data on the NVMe to the SATA drive. I used ChatGPT to help me find all Docker containers using /mnt/nvme/share, then:
- I stopped these containers.
- Backed up the data to the SATA drive.
- Commented the NVMe mount in
/etc/fstaband unmounted it. - Renamed the existing backup folder back to
/mnt/nvme/share. - Restarted the containers.
Operation resumed normally; the disk was ready for passthrough.
Virtualization Process
There are plenty of tutorials on the internet. Generally:
- Enable IOMMU (
intel_iommu=onoramd_iommu=on) in/etc/default/grub. update-gruband reboot.- Blacklist the
nvidiaandnouveaudrivers. - Ensure the
vfio-pcimodule is loaded and the GPU is using it (lspci -k). update-initramfs -uand reboot.- Install the necessary packages:
virt-manager,qemu-kvm,libvirt-daemon-system,libvirt-clients,bridge-utils.
QEMU/KVM/libvirt can be configured via command line and config files, but most tutorials recommended virt-manager GUI. Since my server is headless, I used X11 forwarding and Xming to work over SSH on Windows.
I added the physical PCIe devices to the VM, the RTX 2070 VGA and HDMI audio devices, and the NVMe drive. I configured the VM with a q35 chipset and UEFI firmware as required.
Windows Pain
Windows "seemed" to boot. Well, after multiple rounds of "Diagnosing your PC".
But the GPU doesn't work.
The Nvidia driver installation failed due to a missing Visual C++ dependency. I spent an afternoon troubleshooting only to get nowhere. I concluded my previous installation was in a bad state and it's better to start fresh.
Ironically, what stopped me was not the hardcore Linux complexities of KVM and PCIe passthrough, but Windows 10, the OS that was supposed to be easy.
It Works!
I reset Windows and completed the clean installation. This time the Nvidia driver worked without any problems.
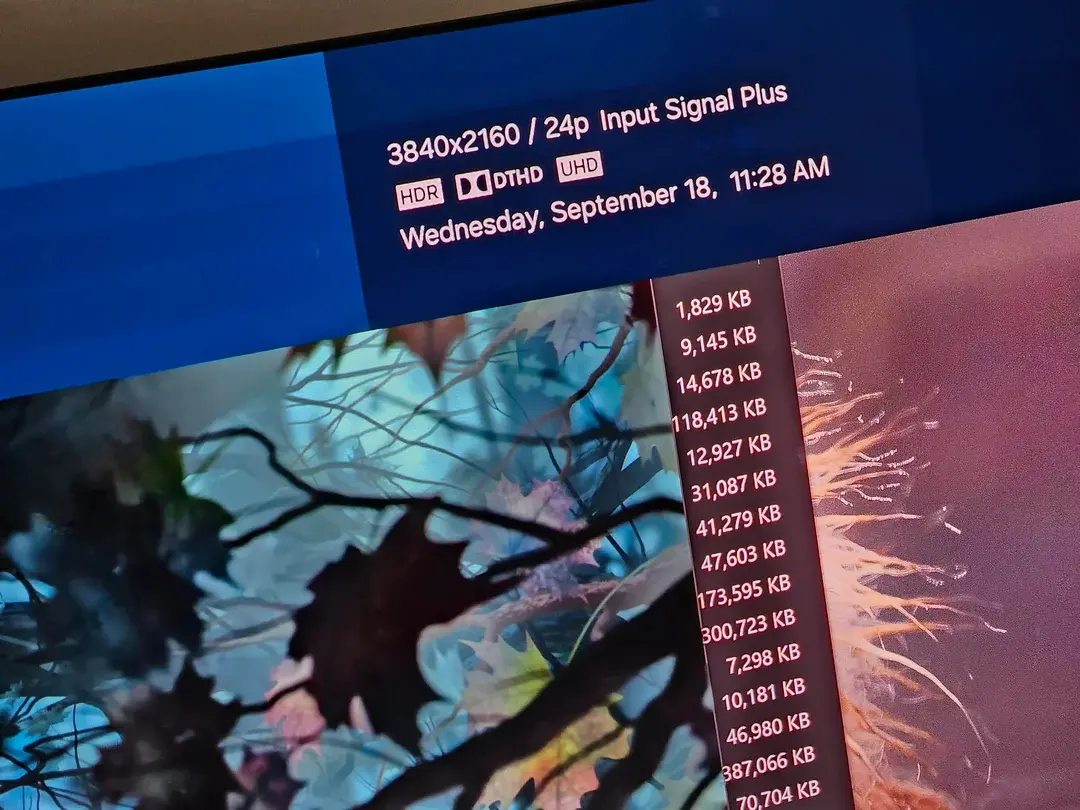
I connected my RTX 2070 HDMI to the TV, and behold, there was video output. The Samsung TV confirmed it was receiving an HDR signal.
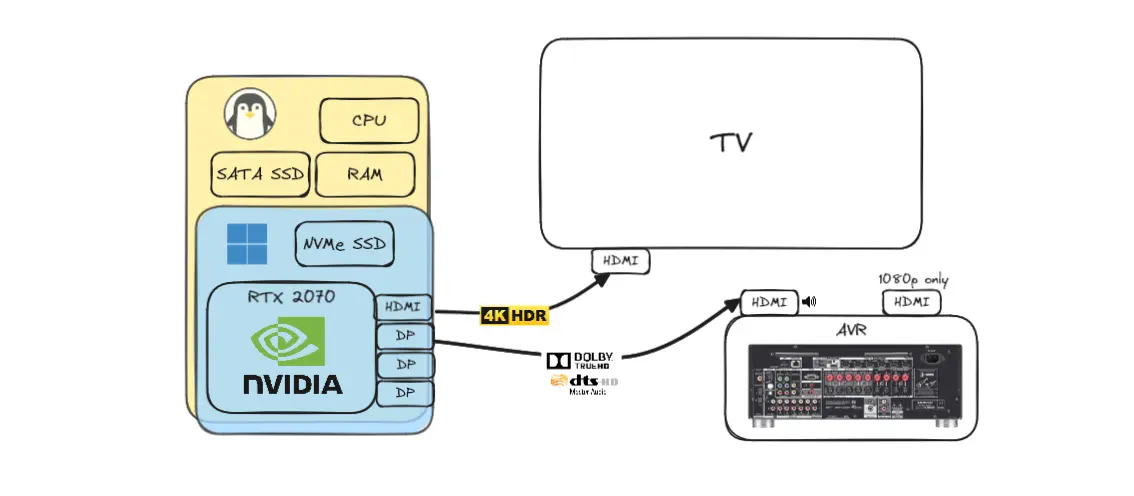
Annoyingly, Samsung TV eARC does not support DTS/DTS-HD. Fortunately, the RTX 2070 has multiple outputs. I used a passive DisplayPort to HDMI adapter to connect to the AVR and changed the sound output.
I could send 4K HDR video to the TV while bitstreaming lossless audio. No eARC extractor required.
Nice to Have
Getting 4K HDR video and lossless audio working was the main goal, but the setup came with a few unexpected benefits.
Eventually, I needed a keyboard/mouse for usage; typically that requires USB port passthrough to the VM. The nice surprise is that the RTX 2070 has a USB-C port which supports data transfer. In effect, my GPU became a USB hub for my convenience.
Networking
Another benefit is VirtIO networking. Instead of emulating Intel e1000, VirtIO is paravirtualized and it achieves near-native performance.
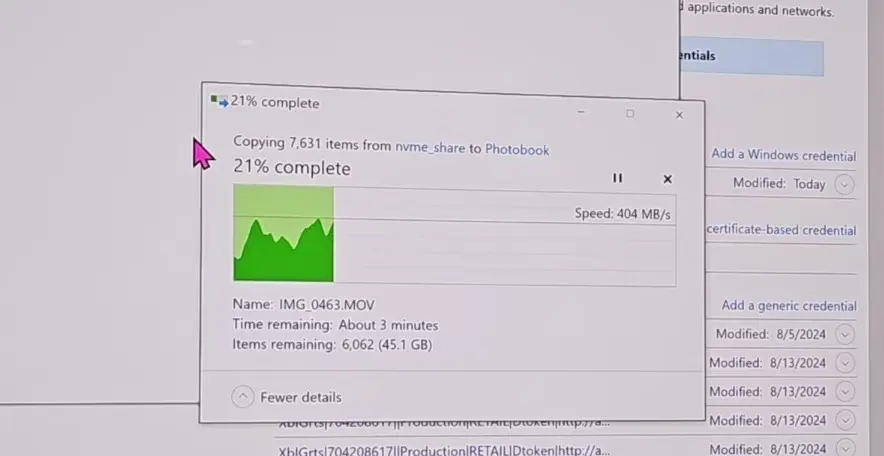
With my media on the host itself, transfers over VirtIO bypassed the physical Ethernet link and effectively ran at disk speed. This was convenient because the living room at that point only had 1 Ethernet port which my server was using.
Power Management and CEC
Normally, when you're not using the computer, you'd shut it down. CEC (Consumer Electronics Control) allows devices to control each other, but it's unsupported with a conventional computer. Hence, it's difficult to use an HTPC compared to a TV box; users need to turn on the computer then the TV (possibly the AV receiver) separately.
But my VM setup gets interesting.
My server runs 24/7, so I assumed it's sensible to shut down the VM when it's not in use. After all, libvirt and the entire Windows VM would consume a lot of CPU resources.
Except it's the opposite. In fact, when I observed higher power usage on my smart plug, it means my VM has crashed and needs a reboot.
- Windows VM running: 45W
- Windows VM off: 65W
When the VM was running, the GPU was controlled by the Windows Nvidia driver, which manages GPU power state and reduces consumption when it's not in use. While with the VM off, the GPU is controlled by the vfio-pci driver on the host, which provides no power saving features.
It's a no-brainer to keep the VM running 24/7. The quirks of QEMU/KVM somehow solve the CEC problem: just turn on the TV, and the PC is already there, ready to use.
Windows Administration
Windows. The ads, bloatware, non-essential services and a bunch of setup that a power user like myself requires. It's a ritual for me.
I used Chris Titus Tech's WinUtil for the boilerplate, and also followed my own extensive documentation to set up everything else.
Scripts and Management
The VM was connected to three displays and only one is the actual screen I want to use.
- The Samsung TV for 4K HDR video
- The AV receiver for lossless audio
- A QEMU virtual display
I tried disabling the AV display output, but that also disabled the HDMI audio. I had to keep it enabled to bitstream lossless audio.
Even with the TV as primary display, Windows would occasionally open applications or lose its cursor on another display. I solved it using AutoHotkey and ChatGPT to write scripts that move all active windows and the mouse cursor to the display with the largest resolution, triggered by a hotkey.
For remote control, I used RustDesk. For some reason, the display became laggy when the TV is off, making it a pain to use. My other method was directly interacting with the TV using the Logitech K400 with the trackpad. Both options ain't ideal, but that's before Codex, SSH and WinRM.
Jellyfin Playback
Jellyfin playback remained a problem despite successful PCIe passthrough. Back in 2024, the official Jellyfin Media Player worked for 1080p SDR TV; it didn’t support native HDR, relying on tonemapping to SDR instead. While it integrates well with Jellyfin server, it's not suitable for my HTPC.
Modern Windows players such as VLC, MPC, and MPV support HDR. The problem was Jellyfin. I could manually copy the Stream URL to play locally, but there is ZERO playback tracking, resume or external subtitles. Not to mention navigating through the browser, copying the URL, and selecting "Play from Network" every time. No thanks.
Fortunately, kjtsune/embyToLocalPlayer bridges the gap. It runs a local Python process that manages desktop media players and integrates with Jellyfin through a userscript. The script intercepts playback requests, launches the selected player, and reports playback progress back to Jellyfin. It also supports external subtitles.
With the "bridge" configured, I finally had HDR playback without sacrificing Jellyfin's library integration. It's less intuitive than Jellyfin Media Player, but it works.
Media Calibration
I chose MPC-BE as the local player, but many options exist.
The r/htpc wiki provides extensive docs on video playback and HDR calibration. And yes, I read through and followed all those procedures. The RTX 2070 was overkill for media playback, and I wanted uncompromising quality. I even painstakingly configured the Samsung TV according to the recommendations on AVSForum.
Except compromises were everywhere.
For starters, Windows doesn't support HDR10+, period. The only advanced format Samsung TV supports. Dolby Vision (DV) doesn't work either, no dynamic metadata, forget about P7 FEL. I later discovered Energy Media Player (EMP) supports basic DV, but won't work with embyToLocalPlayer. The extra effort of navigating to the SMB share and manually opening with EMP isn't worth it, plus additional work required for subtitles.
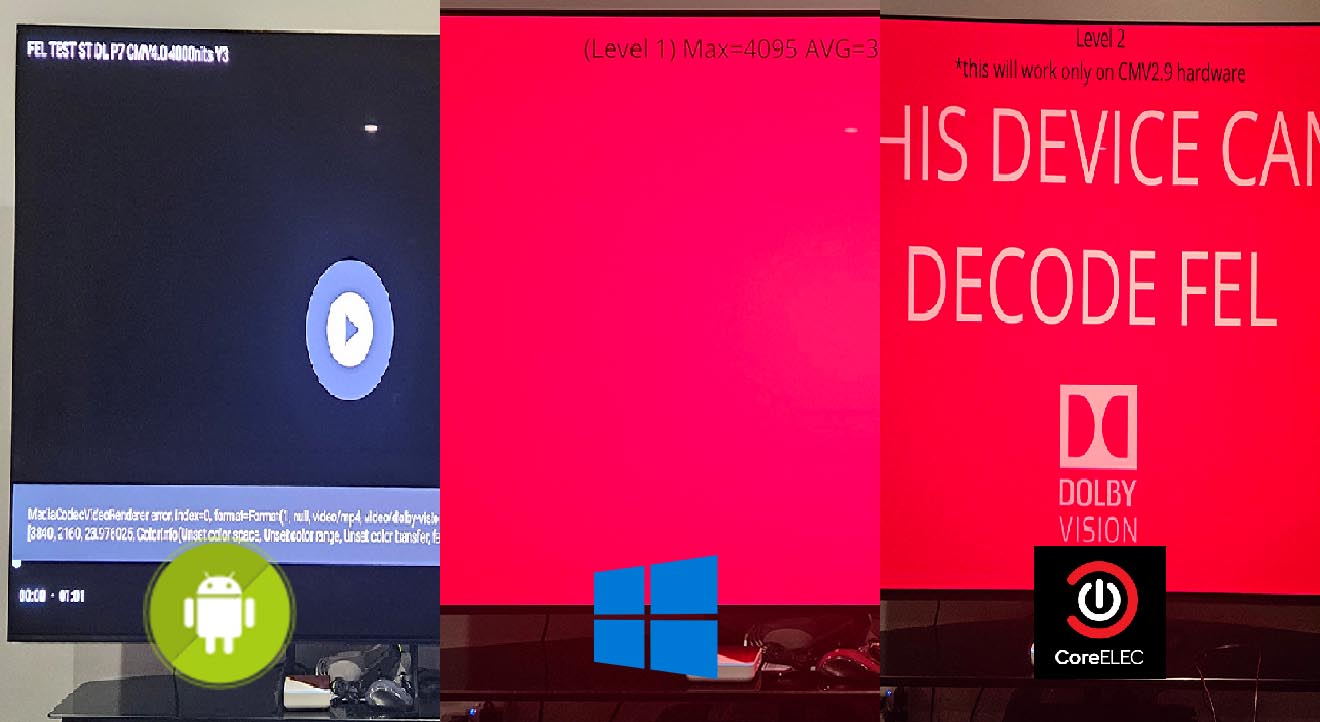
I tried madVR. The result looked good at the expense of higher GPU/power usage. However, madVR does not support DV Profile 5, which shows green and purple tint.
Eventually, I chose MPCVR which handled HDR without color issues. Advanced madVR is designed for HDR tonemapping on SDR displays or low-brightness projectors, which were less relevant for my OLED TV. I could figure out how to "route" media types to specific renderers, but that seemed too much for diminishing returns.
MPC-BE handles proper video playback on PC, while embyToLocalPlayer bridges the gap with Jellyfin; the solution was complete. I had inadvertently become a Windows sysadmin troubleshooting issues and piecing it together, even though this project is focused on Linux virtualization.
Conclusion
The project wasn't about one single IT concept. It brought together knowledge from AV systems, virtualization, Linux, networking, Windows administration, and media playback to solve a practical problem.
The successful implementation of KVM GPU passthrough showcases technical knowledge and creativity to utilize available resources. In the end, I turned my Linux media server into a 4K HDR HTPC without purchasing additional hardware. The only real cost was the opportunity cost of selling my RTX 2070 at a later time.